
How to create a 'Thank You!' page?
Learn how to configure a payment confirmation page which is displayed after payment.
Introduction
A Thank you page is payment confirmation page displayed after payment.
In this tutorial, we’ll show you how to create a Thank you page.
Configuring a Thank you page in 3 easy steps
We advise following these steps for optimal setup:
- Define your requirements
- Create a dedicated page or post
- Configure your form
1. Define your requirements
Before creating your 'Thank You' page, it’s important to clarify specific needs:
- Decide whether the form should redirect to an internal page or post, or to an external URL after payment.
- Consider if you need to personalize the 'Thank You' page with data gathered from the form.
2. Create a dedicated page or post
Start creating your page
Establish a new page or post within your site to serve as the 'Thank You' page. This will be the destination users are directed to after completing a payment.
You can skip this step if your 'Thank you' page is external (it’s on another website).
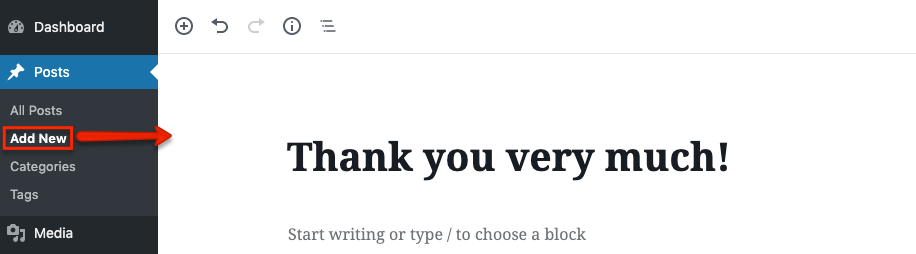
Add a page on the “Pages → Add New” page in WP admin:

Alternatively, you can add a post on the “Posts → Add New” page in WP admin:
Customize your page with dynamic content
You can skip this step if your 'Thank you' page is static.
You can use placeholder tokens to insert data collected on your form into the page.
Placeholder tokens
Refer to the linked article to see the full list of placeholder tokens.
Your dynamic content needs to be surrounded by shortcodes as follows:

Let us embed this example as plain text as well, so you can copy and paste it:
[fullstripe_thankyou]
[fullstripe_thankyou_success]

Hello %CUSTOMERNAME%,

Here's your receipt for your payment:

Transaction ID: %TRANSACTION_ID%

Customer Name: %CUSTOMERNAME%
Customer Email: %CUSTOMER_EMAIL%

Amount: %AMOUNT%


Thank you for your business!

cheers,
%NAME%

[/fullstripe_thankyou_success]
[fullstripe_thankyou_default]
No payment data available
[/fullstripe_thankyou_default]
[/fullstripe_thankyou]
Keep in mind the following:
- Use
[fullstripe_thankyou]and[/fullstripe_thankyou]shortcodes to denote a Thank you page. - Use
[fullstripe_thankyou_success]and[/fullstripe_thankyou_success]shortcodes to enclose the content displayed after a successful payment. - Use
[fullstripe_thankyou_default]and[/fullstripe_thankyou_default]shortcodes to display a message when the Thank you page is called directly, without a payment.
3. Configure your form
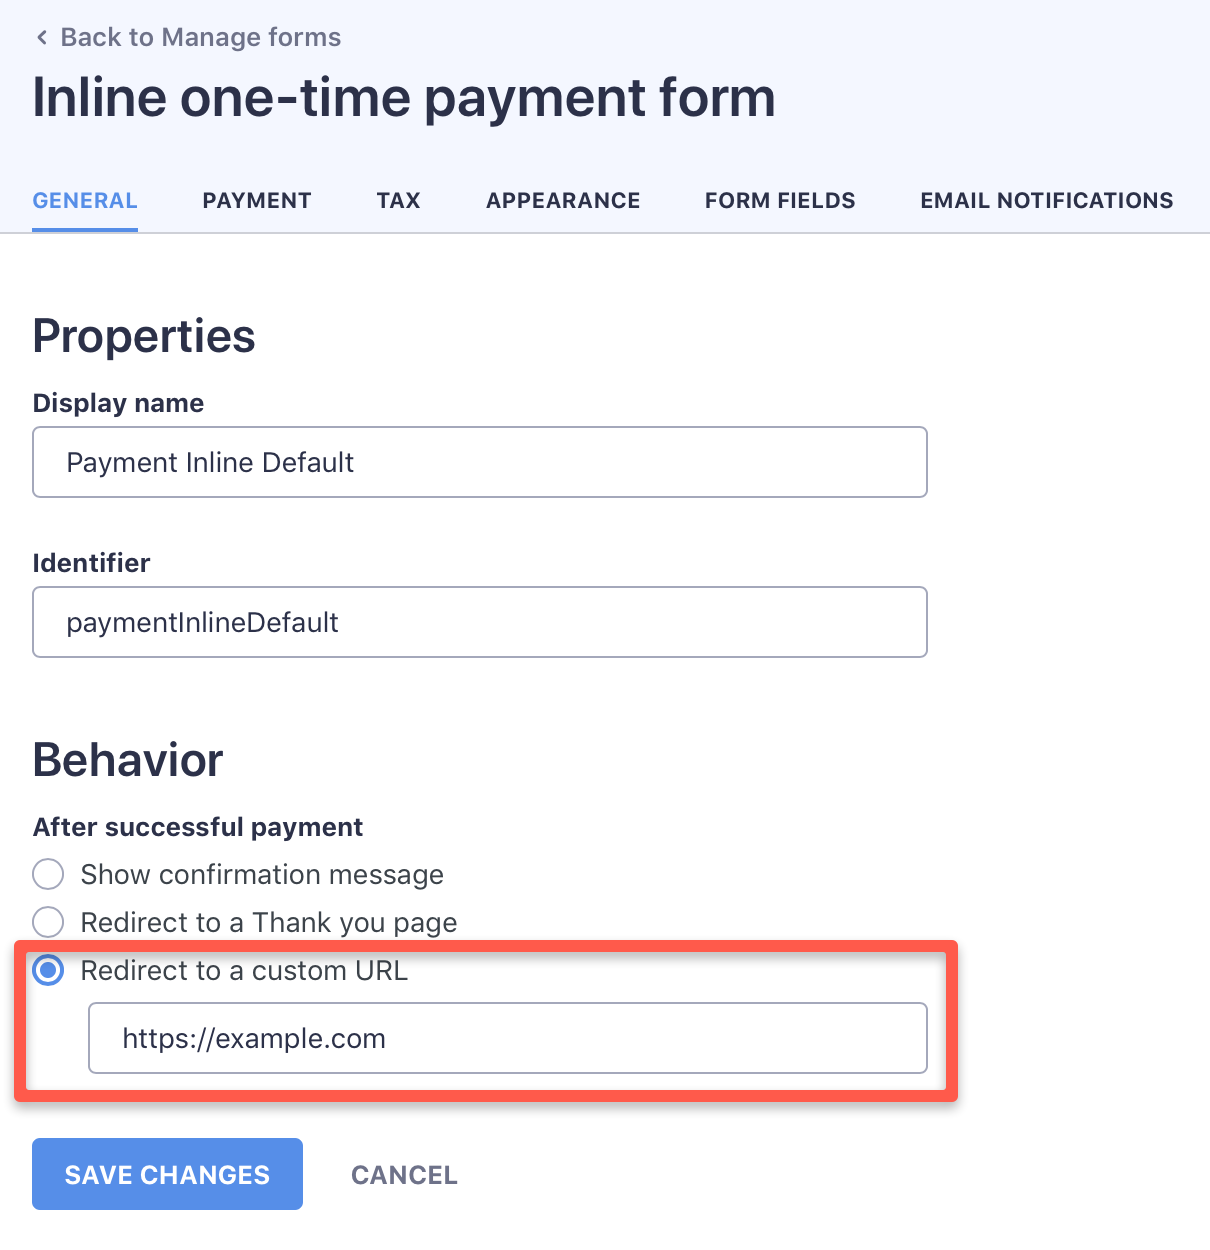
You can turn on redirecting to a 'Thank you' page on the “General” tab of forms, in the “Behavior → After successful payment” section.
Thank you page on your website
In case of showing a page or post, select the “Redirect to a thank you page” option, and select the article from the dropdown:

External Thank you page
If you’d like to show an external 'Thank you' page then select the “Redirect to a custom URL” option:
Save your settings, and you’re ready to go!